Hello Creatives!
Welcome to INSPIRE.
Today do I have a fun project share for you,
PLUS links to an FAB Blog Hop collab with
Rita Barakat Designs & Aladine Ink.
My project was a beyond anything I had made before, and I have to say, I just love how it turned out!
A colorful, decorative inspiration pillow cover, perfect any creative space!
For my project I used the following supplies:
Rita Barakat Designs:
Art Face Stencil
Aladine Ink:
Diamond Glitter Paint
Izink Dye Ink Pads
Izink Dye Ink
Izink Dye Spray
3d Izink Paste
Trio Geometric Stencil
Addtional Supplies:
Beacon Mixed Media Glue
Paper Flowers
Flatback Rhinestones
Metallic Thread
Acrylic Paint
If you have never worked with Aladine products, I encourage you to give them a try.
The colors are rich & super concentrated, and the texture and glitter products, are just.......AMAZING!
So, using a blank canvas round pillow cover (I had purchased some time ago), my project began.
I first added a variety of color and finish using the Izink Dye Spray, being careful to not overlay the colors too much, and letting dry between each spray of color.
I then added encouraging words, using a stamp from my stash and permanent black ink, randomly over the surface of the pillow.
Using the GORGEOUS Diamond Glitter Paint and the Trio Geometric Stencil as well as a couple of different stencils from my stash, I began adding texture, and glitz to the pillow.
I also used a distressed floral motif stencil, along with the 3d Texture Paste, which has a beautiful pearlized sheen, and such a creamy texture, applied with a spatula.
Once I had layered the color and texture on the pillow cover, I set it aside to set and dry.
Now for the the face element.
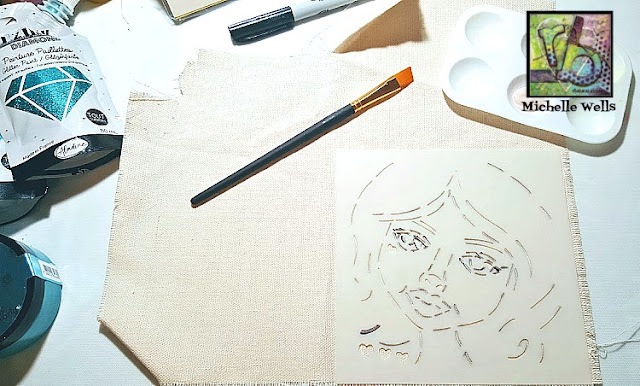
I am absolutely in love with the Art Face Stencils by Rita Barakat. Even if you can not draw faces, theses stencils make it so easy to draw and create art.
I used a 12x12 canvas sheet to illustrate the face.
I first traced the stencil, using a #2 pencil.
Next, I used a flesh-tone acrylic paint, and painted the face.
Once the paint had dried, I then reset the stencil, and traced using a black Sharpie, Fine Point marker, to retrace the face design, making sure that the intricate details would be visible with out the stencil.
For the hair, I used the Izink Dye Ink, applying each color with a paint brush, because a girl has to have colorful hair right?
Once the face and hair coloring had dried completely, I then finished the face using additonal acrylic paint and the Izink Dye Ink, to color her lips and add eyeshadow.
I also fussy cut the design from the canvas sheet, and frayed the edges before adhering it to the pillow cover using Beacon Mixed Media Glue.
For finishing touches, I added some soft paper flowers with rhinestone centers, as well as some metallic silver thread, for an added pop of texture.
And there you have it, a fun, inspiring decorative pillow, to place in a chair in a creative space!
Now, for more inspiration created by the talented
Rita Barakat Design Team!
Just hop along with each link provided here:
Rita Barakat https://ritabarakat.com/?p=5195
Martha Lucia Gomez Hernandez - https://wp.me/p5TnaH-72P
Betz Golden https://betzgolden.com/?p=4476
Margie Higuchi - https://margieh.blogspot.com/2019/08/rita-barakat-designs-mermaid-to-be.html
YolieBurke-
http://www.justyolie.com/.../rita-barakat-aladine-blog...
Check out ALL the amazing projects, leave a comment on each designers blog.
If you are not already a subscriber, subscribe to each designers blog, to receive even more inspiration.
Make certain, that you visit Rita Barakat's blog,
there is always something "extra" special there!
For even more inspiration, be sure to join the
"Rise & Shine With Rita Barakat" Facebook group.
And tune in every Monday evening on
Rita Barakat1 Facebook page, for
"Mixed Media Monday" LIVE!
Thanks so much for your visit today!
Until next time.....
Live Creatively!


Gorgeous artwork, hugs, Lori m
ReplyDeleteOh, what a cool project. I love decorative pillows in my craft room, and study. This is so adorable....I have a canvas pillow cover already, I can make something. You ladies are really inspiring me to make some DIFFERENT THINGS. I mostly make cards, but have wanted to branch out more. Thank you.
ReplyDeleteWOW! This is soooo gorgeous! You are truly talented my friend!!! So excited to learn about all these exciting products!
ReplyDeleteMy goodness! What a stunning project! Love the colors and textures!
ReplyDeleteBeautiful pillow cover. Loving the colors and textures!
ReplyDeleteMichelle! This is so unique and fabulous!! Love that we all have different projects inspired by both companies :) Thanks for the inspiration!
ReplyDeleteWhat a great project, I never would have guessed that was done on fabric
ReplyDeleteThat pillow is gorgeous!I just got new craft aprons so you have given me quite a few ideas.
ReplyDeleteOooo! Love that you did this on fabric �� wonderful
ReplyDeleteI so love your pillow!! Totally motivated and inspired to create.. thank u
ReplyDeleteFun, fun, fun project!!
ReplyDeleteOh this is a fabulous
ReplyDeletecreation! I'd love to
have a pillow like this
for my craft room. Neat
idea.
Carla from Utah
Michelle, I really love the pillow you created. You used all of the products so beautifully....I absolutely love it. Thanks so much for sharing!!
ReplyDeleteMichelle the texture you achived is fabulous. Thank you for sharing your pillow.
ReplyDeleteThis is such a neat project and a fab decor piece for a crafty space. Love the beautiful result and I'll be on the lookout for these products.
ReplyDeleteSuper fun project Michelle!!!
ReplyDeleteI love the color on that background. Even cooler that you did it on fabric. Neat!
ReplyDelete