Friday, July 12, 2019

I Choose Joy Colorful Collage Canvas How To

Hello Creative Friends!
Welcome to INSPIRE!

Today I want to share with you, how a created 
a delightful & colorful canvas that inspires joy for me!


But first, let me tell about the centerpiece for this canvas.

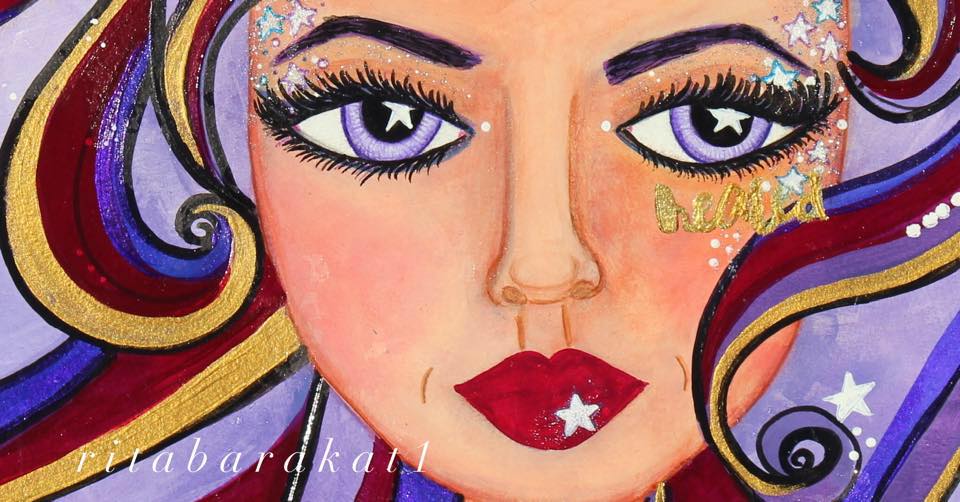
I chose a whimsical paper doll from Rita Barakat's Magical Theatre Book that is filled with moveable paper dolls, backgrounds, and even outfits and accessories too!

Who says you have to be child to play with paper dolls?

This was so much fun to create!

Pick up your copy today!


Alright, now to how I made this lovely. I began with a 4x12 canvas for the base. I first gave a thin coat of clear gesso, and let it set. Once it had set I created a background using scrap patterned paper, tearing it in random bits and adhering with Mod Podge Matte medium to the canvas.


I then added color using a stencil and a variety of colors and finishes from 
Faber-Castell Gelato collections.


Once I selected the paper doll I would be using, I wanted a little glitz, so applied PLAID Glitterific in colors that coordinated with the clothing and accessories.


Using very small brads, I put the paper doll together, and put the finishing touches on the canvas, using stamps and archival ink over the design.

In adding the stamped sentiment to the canvas, along with my paper doll and her juggling balls (which I feel represents the course of life for most of us) I used Scrapbook Adhesive Foam Squares, along with a small dollop of Beacon Mixed Media Glue to add a little extra stick.


And that is it. That is how easy it was to put together an inspiring canvas, that inspires to choose joy, no matter how hectic life can be. 


For additional inspiration with Rita Barakat products and collections, be sure to follow her on Facebook, and subscribe to her blog to stay current with new product releases too!


To purchase Rita's products, please visit her Etsy store at:


And just for an extra dose of fun and inspiration, join in every Monday evening as Rita shares creative ideas LIVE on Mixed Media Monday on Facebook, and join the Rise & Shine With Rita Barakat Facebook group for daily inspiration from the creative Rita and the Rita Barakat Design Team!


Thanks for visiting with me today, and I hope you will visit again soon! 

And until next time.....
Live Life INSPIRED!


Tuesday, July 9, 2019

Fabulous Mixed Media How To With Faber-Castell & Rita Barakat

Hello My Fellow Creatives!
Welcome to INSPIRE!

Today is and exciting day here on the blog.
Why you ask?
It is a collaborative Blog Hop with 
Rita Barakat Designs & Faber-Castell!

And do I have a a fun mixed media project to share with you!


I found a rustic style wood clipboard in one of those dollar bins at Micheals and had been waiting for the perfect time to use it.
This hop was that moment!

To begin, I used Faber-Castell White Gesso over the entire front surface of the board, and let set. Once the gesso had dried, I began the process of adding color and finishes to the clipboard, using a variety of Faber-Castell Gelatos in shades from the Iridescent & Metallic collections.


Once I had layered the colors, and blended with a light spritz of water and my finger, I added interest by using Faber-Castell Stencils.

I added additional interest to the Gelato stenciled butterflies using Faber-Castell PITT Artist Pen Brushes in White & Black. 


I also used the Faber-Castell PITT Big Brush Pen, on a stamp with a handwritten design, randomly stamped allover the surface, making a ghosted background.

Next I added Faber-Castell Transfer Images in a floral motif, along one side and bottom corner of the clipboard to coordinate with the floral die cut from 
Rita Barakat's Be True Die Cut Collection.


Using Gelato's & Faber-Castell Aquarelle Watercolor Pencils, I colored in the transfer images, using water & a fine tip watercolor brush.


I also used this technique with the other Faber-Castell Transfer Images used on the clipboard.

To give a more rustic look to the design, I used PLAID Painted Finishes in Rust on the clip to give an aged look.

To finish the design, I added a beautiful cowgirl die cut from Rita Barakat's Wild And Free Collection, using Scrapbook Adhesives.


And there you have it, a clipboard to sit on your creative surface, or desk to clip creative ideas to, or use to clip on daily inspiring verses or quotes.


NOW........it is time to Hop along!

Follow the links provided here, to check out ALL the creative projects created by the talented Rita Barakat Design Team!


Remember to leave a comment on each blog, and follow all the way through!
And if you are not yet a subscriber of the FABULOUS blogs, I encourage you to do so, so that you may receive fresh inspiration!

For the Faber-Castell products used in this creative project visit your local craft store OR Faber-Castell online at:


For the Rita Barakat Die Cut Collections and more, please visit Rita's Etsy store at:


Monday, July 1, 2019

From Scrap Wood To A Whimsical Piece of Art How To

Hello Creatives!
Welcome to INSPIRE!

Do you ever look at something basic or ordinary and think about how you can turn it into something FAB?

Well, that is exactly what I did with a scrap wood block, some paint, paper, stamps and the AMAZING Magical Mysteries Embossing Powder by Rita Barakat!


My hubby is a hobbyist carpenter, so there is generally a good amount of scraps laying around in our garage, so when I find I am stumped creatively, I usually raid the scraps.


With this design I decided to use wooden (small) drawer pulls I found at Hobby Lobby as the legs rather than the wooden spool in the photo above. 

I chose some scrap patterned paper from my stash to use as a background and proceeded to add it to the block by tearing the pieces and adhering it with Mod Podge Matte finish.


Once the Mod Podge had set, I used a dry brush technique, and added white gesso to the paper. I then used a variety of stamps, along with archival black ink, and added to the "background" for my design.

On a separate piece of paper, I used blue ombre' ink, and 
Rita Barakat's "Dream Chaser" Art Foamie Stamp. While the ink was still wet, I added Rita's Magical Mysteries Embossing Powder in Midnight Magic, and set with heat.


For the wood heart cut-outs, I brushed two coats of white gesso to the surface. Once dried, I used an Embossing Ink Pad stamped on the surface of the hearts, and added 3 coats of Rita's Magical Mysteries Embossing Powder in Kiss of the Fairy and heat set between each layer.


Using Beacon 527 Multi Use glue, I added the "legs" to the bottom of the block, and a mini finial to the top, all which had been painted with PLAID Folk Art Acrylic Paint.

I also added a resin fairy embellishments, and an embellished paper butterfly, a metal photo bracket, the Art Foamie Stamp sentiment & the embossed hearts.

To bring just a bit more whimsy, I embellished the finial with seam binding and a maetal pendant.

Such a colorful and whimsical fun design. And what better to chase a dream then a fairy?


I hope you enjoyed this project, as much as I enjoyed making it!

For even more inspiration, be sure to to join Rita EVERY Monday, for MIXED MEDIA MONDAY LIVE on Rita Barakat 1 Facebook page.


Sign up to follow Rita & her design team as they share crafty projects and inspiration in the "Rise & Shine With Rita Barakat" Facebook group.


Stay connected by signing up for Rita's blog, where you can stay up to date with class bookings and more directly from Rita herself!


For ALL the magical, whimsical, and BEAUTIFUL products by Rita, please visit her Etsy store at:


Thanks so much for stopping by today!

Until next time.....
Live Life INSPIRED!