Friday, December 9, 2016

Not So Fun Room Switcheroo

Hello Everyone.
Stopping by to share something,
not directly crafty.
 
In my massive amount of creating,
I am building a little "stock",
and running out of places to put them.
 
 I have began the journey of switching
the smallest room in our house
(which has been my craft space for a year)
back to the larger room that I had
originally started my craft space in.
 
It has not been easy, as I tend
to be a bit of a perfectionist.
So, the following photos
are the process thus far.
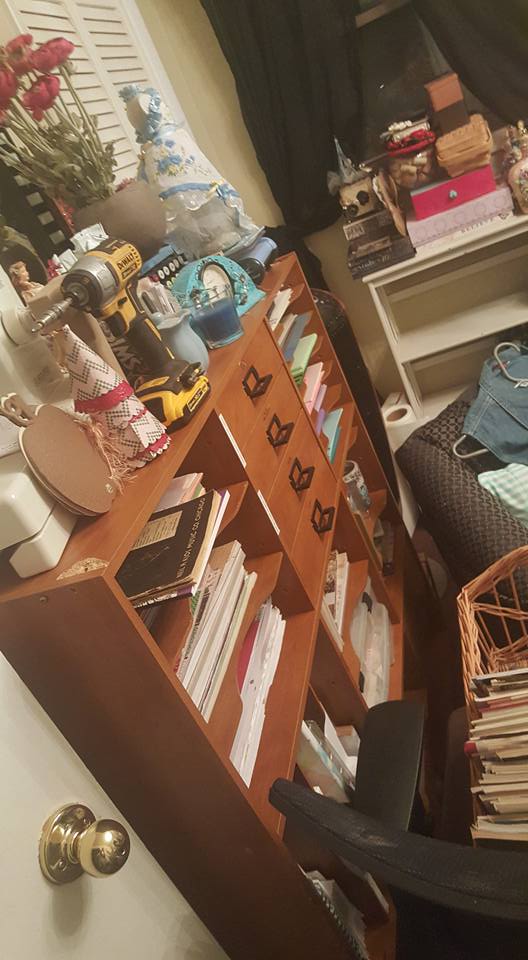


I still have quite a way to go,
in finishing the space with
some cheerful paint, including
painting the brown craft cabinet
white to match the other shelving
And I would love to find a mod/retro
designed area rug for the space.
 
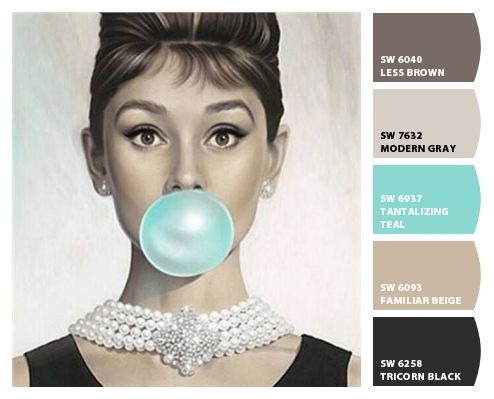
My design board concepts
(luckily I found these on Pinterest)


A new year is just on the horizon
and I am hoping for
it to be full of possibilities for 
this creative gal, so I need the space
that inspires.
 
 
Thank You so much for stopping by.
 
Visit again soon.
 
Crafty Blessings!


Saturday, December 3, 2016

Glistening Snow Card Box

Happy Saturday Morning
to all of you!
 
 
Today for The Robin's Nest
I am sharing my tutorial
for how I "recycled" an old box, and transformed it into a
"Glistening Snow"
Card Box,
using GORGEOUS paper & embellishments
from The Robin's Nest.
 
You will find the details of
how I created this box following this link:
 
For the supplies I used, follow either link from below
 to The Robin's Nest Online Store.


Thanks for stopping by!
 
Crafty Blessings!

Friday, December 2, 2016

Festive Snowman

Hello everyone!
Welcome to INSPIRE.
 
Today I wanted to share my latest
creative endeavor,
my very first modeling clay figurine,
a festive snowman.


This has been a couple of weeks in the making,
but so worth the finished results.
 
I began this project with a
styrofoam ball as the body bass.
I then created the "head" with wading
a couple pieces of newspaper into a ball shape, then secured the ball with duct tape.


For the legs, I used two wine corks,
with heavy wire inserted, just slightly leaving 
 over a 1/4 inch long, to insert into the
styrofoam body for added support.


I formed the arms with the same heavy wire, wrapped in newspaper & duct tape, leaving wire to insert into the body, and added wire to the base of the head as well.
To completely secure all joints, I used
permanent epoxy glue.
 
Once the glue had set, I covered the entire snowman with texture paste, to give a snow like texture.
Followed by 2 coats of white gesso, and sprinkled with glitter while wet, as to set glitter as it dried.
 
 
For finishing touches, I used black seed beads to form the mouth, added the clay "carrot" nose I created with clay and painted, and used
The Robin's Nest Dew Drops
in black, for the eyes
(The link to The Robin's Nest
online store is below)
gave him rosy cheeks, and some snowy goodies to hold.
 
The snowman's stand is a candle tin
covered by fabric tape, and embellished with a metallic jeweled snowflake.
I made his hat out of felt, and added glitter glue in baby blue, to give a frosty look to the top edges.
Velvet ribbon around his neck & the trim on the hat, completes his look.
 
 
I couldn't be more thrilled with the finished project.
I hope you enjoy it too!
 
 
Thanks so much for stopping by!
Visit again soon.
 
Crafty Blessings!
 
*The Robin's Nest*


Thursday, December 1, 2016

The Robin's Nest Collection of the Month

Hello
I wanted to share with you
the link to
The Robin's Nest Collection of the Month
"The Wedding Collection".
 
 
Whether you are making a wedding card,
or creating an album full
of joyful memories,
this collection is the perfect touch,
with it's elegant paper & cardstock.
 
Visit
The Robin's Nest
for ALL your paper crafting supplies!


I Believe In Angels

Hello there.
Thanks for visiting INSPIRE.
 
 
I am dropping in to share one of many
projects I have created as of late.
 
An angelic vignette.
 
I created this project for
The Vintage Rose Emporium.
An online store featuring
FABULOUS
Vintage/Vintage Inspired
ribbon, lace, bling & more.
Be sure to follow the link below
and visit VRE.
 
I began this project with
a couple of different size
vignette boxes.
I first used a light coat of gesso
to cover each box.
 
Then to the outside of the boxes,
I covered with an elegant foiled paper
using a matte medium.
On the inside, I used vintage sheet music
applied with an antique decoupage.
 
 
I chose the beautiful cherub face as well as selections of bling, buttons and applique wings
all from VRE.
 
I lightly added sheen to the cherub, frozen charlotte, and even applique wings, using metallic rub on medium, and Perfect Pearls Pigment Powders.
 
 
The results, vintage with a hint of elegance.


Thank You so much for visiting.
 
And remember to visit
The Vintage Rose Emporium
for your vintage style
 
Crafty Blessings!


Tuesday, November 29, 2016

Getting Holiday

Getting Holiday here, 
as I am sure everyone is, 
This time of year.

Wanted to share my very
first order for Christmas cards.


Although there were
multiple layers and design elements,
I am very pleased with the finished results.

A little glitter glue to add 
a wintery look, and the 
design was complete.


Hope you like the design, 
and find yourself inspired.

Thank You
for visiting!

Crafty Blessings!


Saturday, November 26, 2016

Small Business Saturday & Cyber Monday

Hello All!
 
As everyone is now fully in the
hustle & bustle of the Christmas season, let's not forget to support local small business's
 on this Small Business Saturday
(this support should continue year long)
and also support those types of business's that are exclusively online too. 
 
Now that Black Friday is behind us,
I wanted to share a link to a  FABULOUS online business, that has EXCLUSIVE
paper stock, chipboard, embellishments and  
SO MUCH MORE
for your paper crafting & scrapbooking needs.
 
Visit The Robin's Nest
online store at:
 

For creative inspiration
visit The Chattering Robin's blog
  to see ALL the AMAZING projects
created for The Robin's Nest
by the talented TRN Design Team.
 
 
Thanks so much for stopping by!
Please visit again soon!
Crafty Blessings!


Saturday, November 19, 2016

Sharing Christmas Magic

Hello Everyone
& a Happy Saturday to you!
 
 
Wanted to invite y'all to check out
my latest project for
The Robin's Nest.
 
For now, a sneak peak.
 
 
For all the details on how I created this project,
stop by and check it out
at
The Robin's Nest
on Facebook.
 
 
Thank You so much

 for visiting!
 
Crafty Blessings!
Michelle


Tuesday, November 15, 2016

THE ROBIN'S NEST Featured Product Line of the Month

Happy Tuesday
Everyone!
 
 
Looking for some crafty inspiration?
 
Head on over to
The Chattering Robin's blog
and see what the talented
design team has been creating!
 
 
And be sure to visit
The Robin's Nest
online store

for exclusive paper, cardstock & embellishments.
 
 
While there, check out the
Featured Product Line of the Month!
you will LOVE it!


Thanks for stopping by!
Please visit again soon.
 
 
Crafty Blessings!
Michelle


Sunday, November 13, 2016

Angelic Wonderland

Hello Everyone.
Wanted to share my latest project for
The Vintage Rose Emporium.
 

I think that I have become quite
addicted creating with Peat Pots.
Yes, Peat Pots.
 
These little delicate pots,
are not just for planting,
but can be made into the most
BEAUTIFUL decorations,
for holidays or just because.
 
Today, I am sharing
a Christmas decorative pot,
with delicate color and lots of sparkle.
 
I first coated the peat pot with white gesso, leaving areas exposing the natural color of the pot.
Once gesso dried, I dry brush with pearl paint in a delicate green & pink, still leaving the natural areas slightly exposed.
 
Next, I took a 4-inch white bottle brush tree, and added some pigment powders with a small fan brush, in a layered design, very LIGHTLY spritzing with water to soften.
 
 
I used glitter glue to a Victorian angel image I found on Pinterest.
Once everything had dried, I began adding glitter with a very light coat of glue medium to the "snowy" base of the top of the pot.
 
Final touches of Christmas embellishments, and BEAUTIFUL lace, buttons and a domed vintage style brooch from The Vintage Rose Emporium,
bringing the entire look together,
creating a delicate Victorian Christmas piece of décor.


I hope you enjoy this project, as much as I did creating it.
 
 
Please be sure to visit The Vintage Rose Emporium
for vintage, and vintage inspired goodies for your creative projects.


Thank You for stopping by,
visit again soon, for more projects
created to INSPIRE.
 
Crafty Blessings To All!